Showing posts with label DIY. Show all posts

Tuesday, October 20, 2015

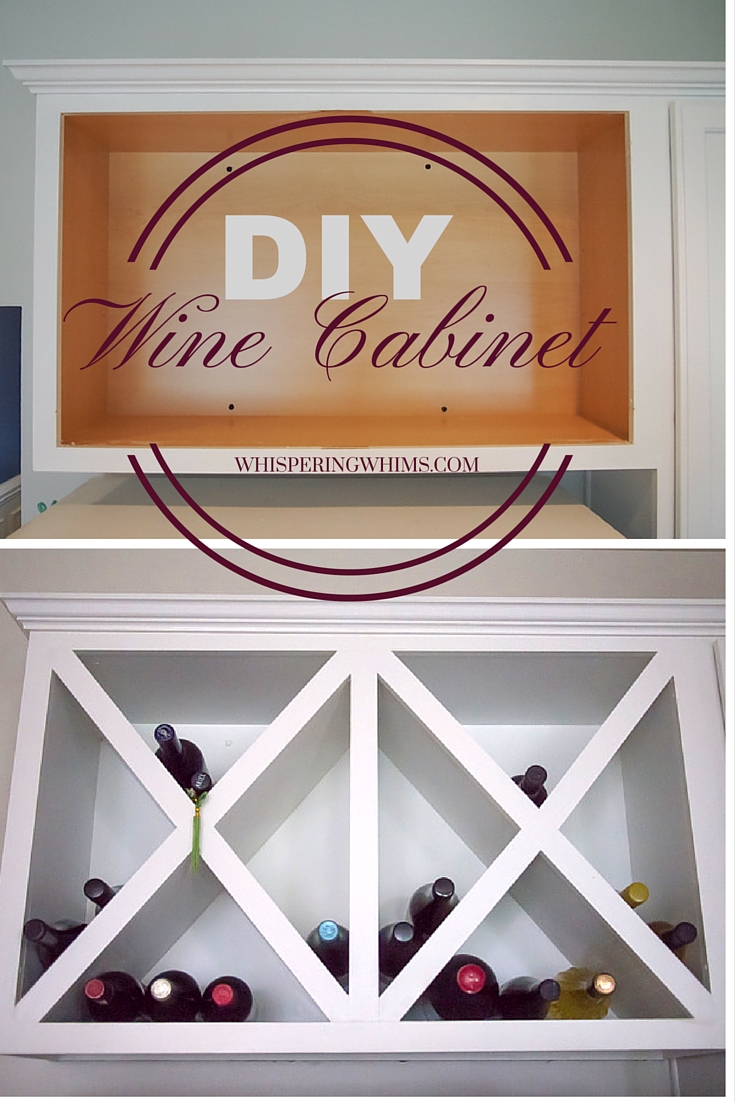
DIY Wine Cabinet

You know what is the best feeling?

When you come home from a trip to find that your husband finished one of your projects for you...❤!!!

Yes, my husband is a keeper.  

Last Monday, I came back from a trip to NY to visit family, and I did a double take when I walked into the kitchen.  The wine cabinet project that I had left 75% of the way completed, was finished!!!
 {Happy Dance!}

DIY Wine Cabinet - Above the Fridge | Whispering Whims


Since we moved into our home 2 years ago, I have been planning this project, and in August finally decided to just go ahead and have at it.

On one of my Friday's off, I woke up and found where we keep our handsaws, then proceeded to climb on top of our refrigerator and remove the cross piece of the cabinet. :)  All the while, the Mister is laughing and trying to get ready to leave for work.  Just a normal scene from our daily lives.  Haha!

Anyway, that weekend we got everything prepped, primed, cut, sanded, and fitted.  It sat like this for another week, until I was able to caulk the seams... but then I noticed that the front pieces of wood were overhanging the cabinet ever so slightly, which meant we needed to do quite a bit more sanding... have you ever gotten to this part of a project where you are SO close to being finished, only to then require another few hours of effort to seal the deal?  Well, occasionally, when this happens, especially on a Sunday, I just need a break. 

So the project sat, and sat, and well... lucky for me it *magically* got finished while I was out of the house.  AND, there was not a speck of sanding dust to be found.  Only a beautifully finished wine cabinet that looks like it could use a few {several} more bottles! 

Aside from the minor issue with the fit, this project was pretty simple. 

Materials:
5/8" Plywood
1"x 2" boards (we had some extra from another shelf project)
Caulk
Primer
Paint


Tools Used:
Miter Saw
Brad Nailer
Orbital Sander

Project Total: $30-35

Here were our construction steps:


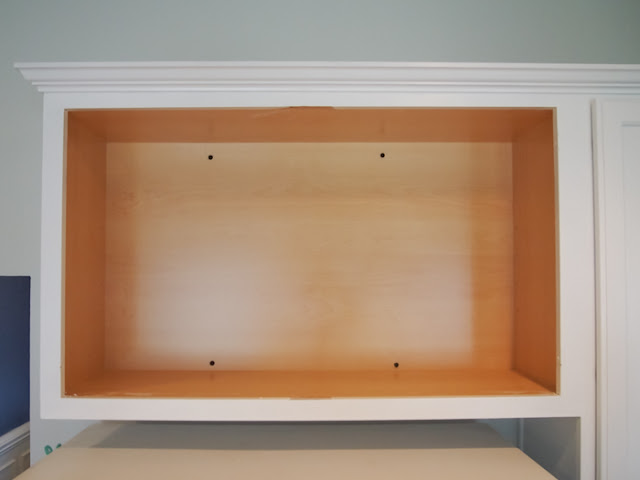
  1. Remove cabinet doors, shelf, and cross piece. 
  2. Clean cabinet interior
    DIY Wine Cabinet - Above the Fridge | Whispering Whims
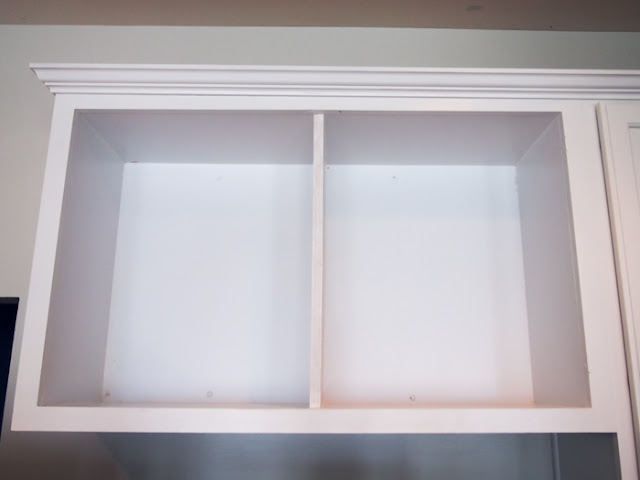
  3. Prime cabinet (2 coats) 
  4. Paint cabinet (2 coats)  Let this dry completely before assembling the wine shelves.  If the paint has not thoroughly cured, it will peel.
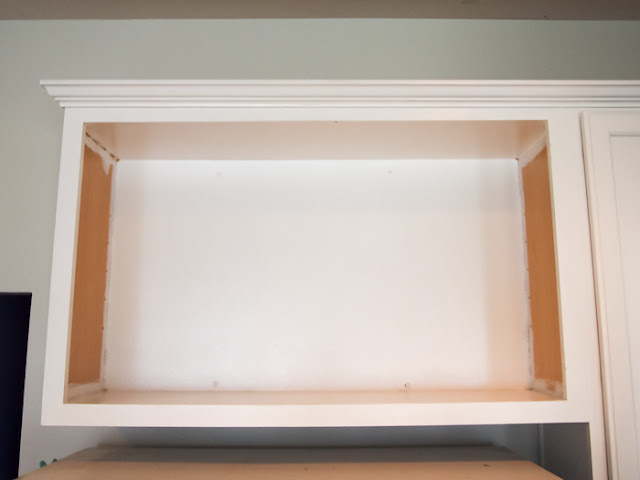
    DIY Wine Cabinet - Above the Fridge | Whispering Whims
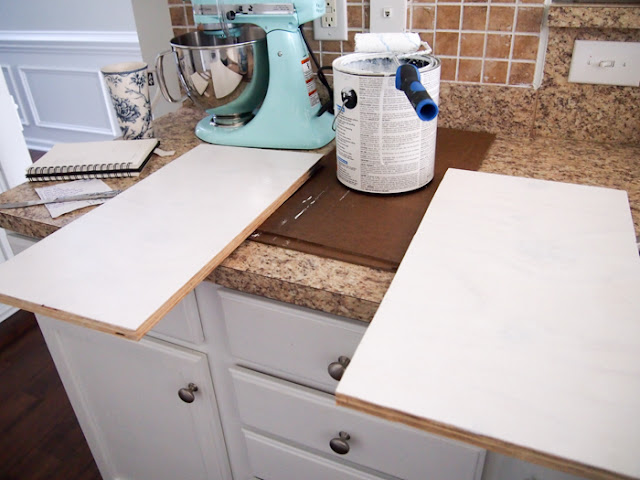
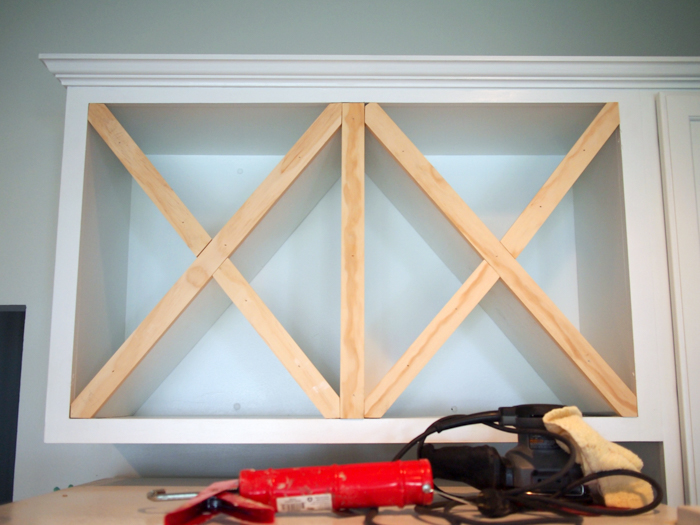
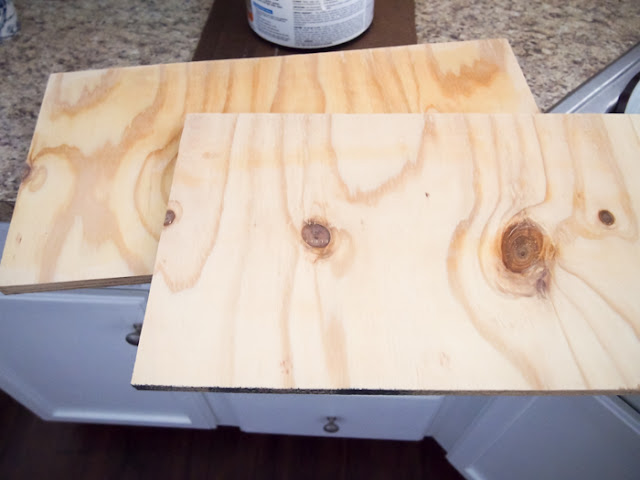
  5. Cut the three vertical shelves from the plywood.  We put one vertical piece of wood in the center to divide the cabinet space and make two X shelves for wine.  We used two additional vertical pieces of wood to make the sides of the cabinet flush with the cabinet edges (note: in the image above, the two unprimed sides).  This allows the X shelves to slide into place, flush with the edges.
  6. Sand, prime, and paint, then secure in place with Brad Nailer and Liquid Nail.  We used only glue for the side pieces.  For the center piece we used liquid nail along the top and bottom and also nailed it into place.
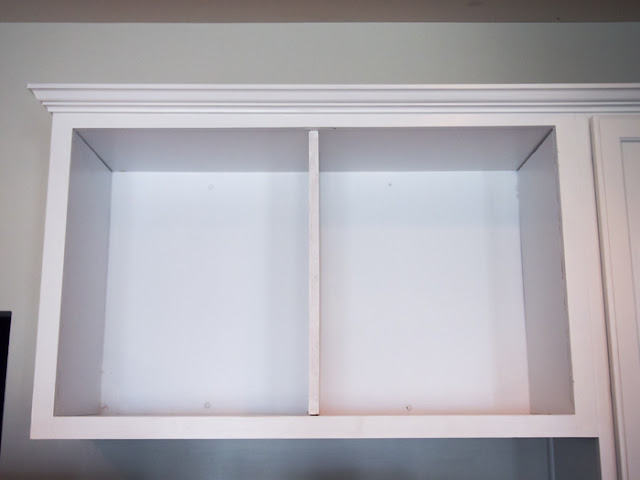
    DIY Wine Cabinet - Above the Fridge | Whispering WhimsDIY Wine Cabinet - Above the Fridge | Whispering Whims
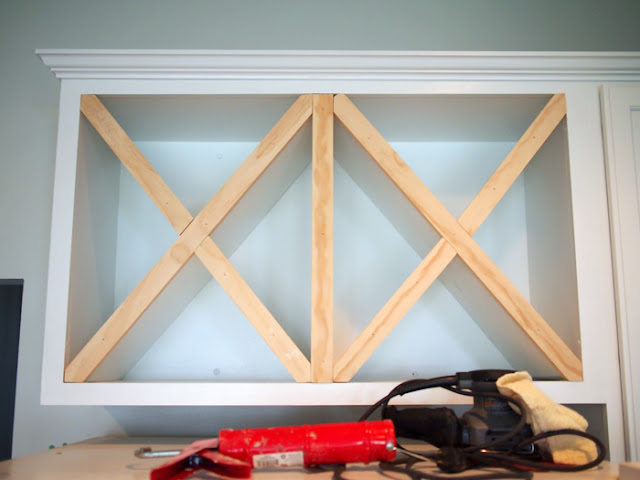
  7. Once the vertical shelf is in place, measure the length of the cross pieces you will need.  We measured and cut our wood to length first.
    DIY Wine Cabinet - Above the Fridge | Whispering Whims
  8. Next we determined the angle of the end cuts by holding our cross boards up to the edge of the cabinets and marking the boards where they touched (the geometric math only works so well). 
  9. After the end angles were cut, we inserted one piece at a time and then marked the middle of the board where the middle notch needed to be cut.  This part is what the experts call "custom cabinetry," which is really a bit of trial and error to make sure you cut and chisel out the space for a perfect fit.
    DIY Wine Cabinet - Above the Fridge | Whispering Whims
  10. When all cuts were made we slid all pieces into place to make sure they fit well.
  11. Prime and paint the cross shelves.
    DIY Wine Cabinet - Above the Fridge | Whispering Whims
  12. Insert into the cabinet and caulk all seams.
  13. Measure and cut the 1"x2" boards to finish the edges. 
  14. Attach edges with Brad Nailer
    DIY Wine Cabinet - Above the Fridge | Whispering Whims
  15. Fill holes with caulk.
  16. Paint one last coat to cover the caulk seams and edges.
    DIY Wine Cabinet - Above the Fridge | Whispering Whims
I'm so happy to have this project finished and also to have a new place that's out of the way to store some wine! It's great to gain a bit more counter space.  Time for some entertaining! ;)

Thursday, October 1, 2015

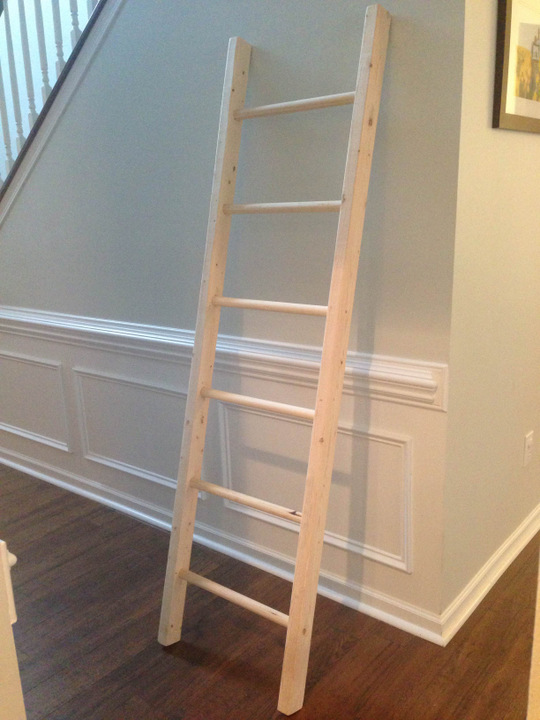
DIY Pottery Barn Inspired Ladder

With the temperatures starting to cool off and this whisper of Autumn in the air, 
I've been on an endless pursuit to cozy up our home.
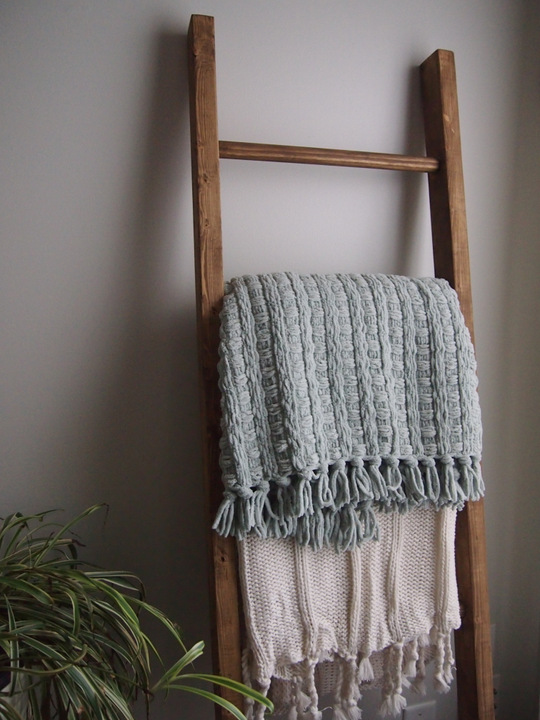
Pottery Barn Inspired | DIY Blanket Ladder $25 | Whispering Whims

Time to bring out the blankets, candles, and harvest decor.  

So, in between the 3 unfinished projects I've been whittling away, 
{dining room gray conundrum, cabinet wine rack, and a file cabinet makeover}
I decided it would also be a good time to start a new project. :)
Specifically, I needed a place to display/store my cozy blankets.

I needed a place safe from our pets, where they couldn't climb all over my blankets
 and leave behind their fur, unlike the arm of a sofa or over-sized basket.

Recently, I purchased a couple knit throws from Pottery Barn
and remembered seeing them draped over a rustic looking ladder in the photos. 
It looked interesting, cozy, and I knew exactly where I would place it.

Of course, when I went to go see how much the ladder cost, I was a bit shocked.
There is no way I was going to pay $250 for a ladder that I could surely make for 10 times less. 

I stalked the Potter Barn ladder for dimensions, estimated the wood and dowel sizes, 
then I marched to the store to go buy said supplies. 

The dimensions I originally figured were as follows:
5' tall by 19" wide
5 rungs spaced about 11" with about 8" gap on either end

NOTE: I measured out 5ft on the wall and since our ceilings are pretty high, it just looked a bit underwhelming.  I decided it needed to be a bit bigger.  Pottery Barn sells an 8ft ladder, but 8ft looked a bit too big.  Instead, I went with 6ft and adjusted my dimensions to the following:

6' tall x 20" wide
6 rungs spaced 11" with 8.5" gap on either end

Materials Purchased:
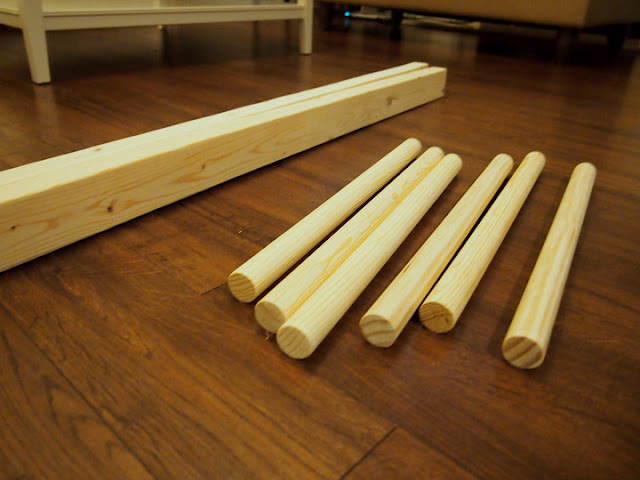
$15 (3) 1 1/8" x 48"  Solid Wood Dowels
$4 (2) 2" x 3" x 96" Kiln-Dried Whitewood Stud 

Tools Used:
Drill using 1 1/8 Woodboring Spade Drill Bit
Compound Miter Saw 
{any saw can be used if you have a steady hand and a good sander}
Electric Sander

Other Materials:
Elmers Wood Glue
Elmers Wood Filler
Straps or Clamps
Stain


  1. Cut the 2"x 3" down to 6' length
  2. Cut the dowels to 20" length

    Pottery Barn Inspired | DIY Blanket Ladder $25 | Whispering Whims
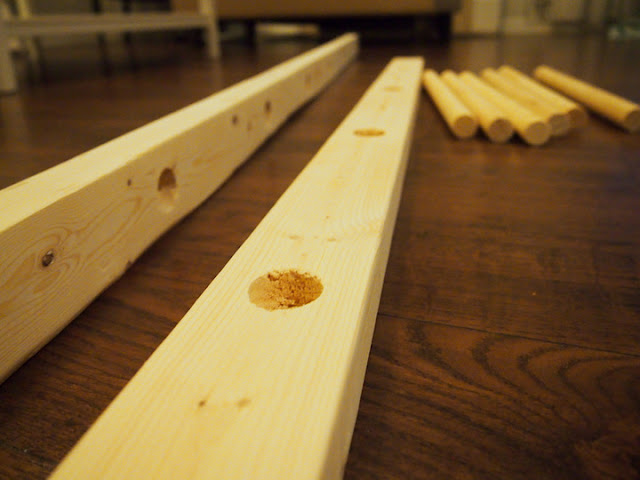
  3. Measure 8.5" up from the bottom of the 2"x 3" side pieces and mark where your rungs will be placed, every 11 inches. 
  4. Drill rung wholes 1/2" deep.

    Pottery Barn Inspired | DIY Blanket Ladder $25 | Whispering Whims
  5. Wood fill and sand any imperfections or knots
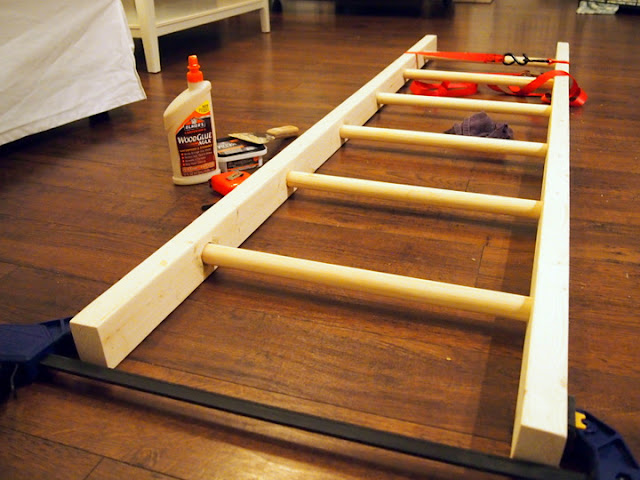
  6. Glue in rungs, measure width of ladder to make sure it is even from bottom to top
  7. Clamp or strap the bottom and top

    Pottery Barn Inspired | DIY Blanket Ladder $25 | Whispering Whims
  8. Lay flat to dry overnight
  9. Do any last wood filing, sanding, and dusting
  10. Prime wood for staining with a wood conditioner
    Pottery Barn Inspired | DIY Blanket Ladder $25 | Whispering Whims
  11. Stain wood with desired color. Allow to dry overnight. {I used a brown glaze left over that was never used when we did our cabinet redo.}
    Pottery Barn Inspired | DIY Blanket Ladder $25 | Whispering Whims
  12. Coat wood with wax or clear polyurethane
Pottery Barn Inspired | DIY Blanket Ladder $25 | Whispering Whims

Pottery Barn Inspired | DIY Blanket Ladder $25 | Whispering Whims

Pottery Barn Inspired | DIY Blanket Ladder $25 | Whispering Whims


My next goal for the living room is to get this IKEA chair and chaise to flank the fireplace.


Also, there is an imminent ottoman makeover... the whim is more than whispering.
My poor ottoman needs a slip cover or reupholster, badly!


Wednesday, September 23, 2015

Not Absent - Just BUSY!

The past month has been one of the greatest examples of how the measurement of time is truly inadequate it terms of how it is experienced.  I know it's only been a month since Paul began his master's classes, but it feels like it's been AGES!

His classes are keeping him busy, and I've been busier than ever as well.  I don't know how all those single mama's {and papa's} out there do it!  I am just taking care of a couple fur babies, a house, and a husband and it feels like there is little down-time now.

One thing I can say, is that my crock-pot has been indispensable!!  I have been making everything from stews and potatoes to oatmeal and hot chocolate.  I've been learning some new shortcuts and getting more organized (and disorganized) than ever.

Right before Paul started classes in August, we started a series of projects that we thought we could get finished in a weekend or two, but they have been now getting whittled away during nights and spare moments during the weekend when he's not in the library. Luckily, we are more than 75% of they way done and I am hopeful that in a couple weekends it will be 100%.  :)

Here is the list that has been consuming my time:
Posts coming soon...


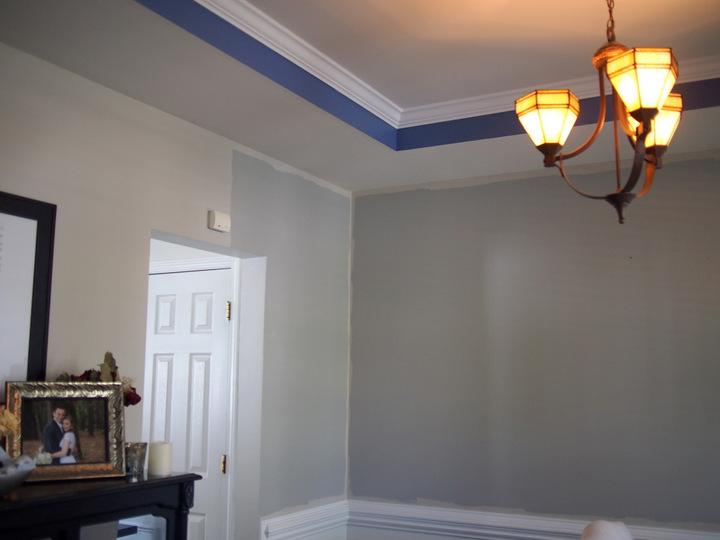
  1. Gray Conundrum: I painted my dining room... now I'm painting it again. Gray - the most difficult color ever.
    Revere Pewter & Lamp Room Gray | The Gray Conundrum | Whispering Whims

  2. Wine Rack Cabinet DIY: Transforming our unused cabinet above the refrigerator into a space for wine!
  3. Filing Cabinet Makeover:  We had an old filing cabinet in the garage, I got inspired by some Pinterest pins, and then decided... let's do this. :)
    File Cabinet Makeover | Whispering Whims
  4. Rustic Pottery Barn Ladder DIY:  In the pursuit of cozy... I needed a place for blankets, but not for a $250 price tag.

Aside from all that, I'm planning/packing for a couple upcoming trips to NY!  It's going to be great to get some time with good friends and family, not to mention the crisp Autumn weather and Fall foliage. 

Tuesday, August 11, 2015

DIY Planter Boxes with Pallet Wood

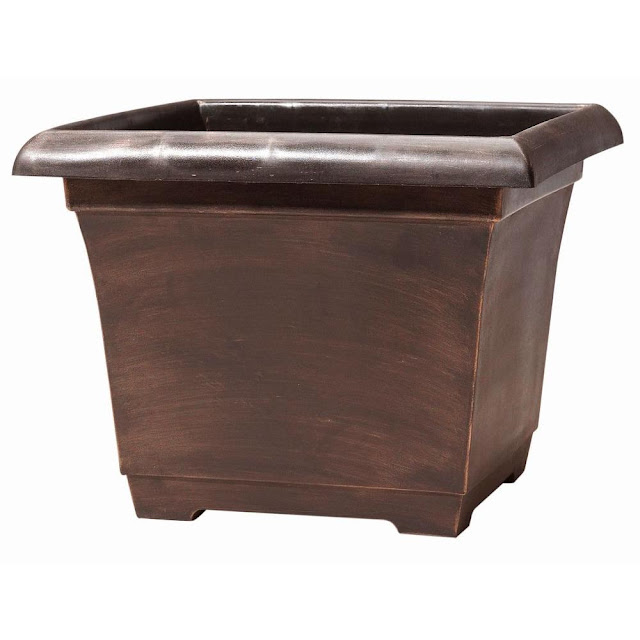
Back in the Spring, we picked up a couple 14.9" square plastic garden planters from Home Depot. While they were a good deal and looked nice, they were lacking height and just didn’t have the look we wanted on our front porch..  
14.9 in. Warm Copper Leonardo Square Plastic Planter

Since we've been hoarding some dismantled pallet wood since last Fall, I figured it was time to put it to good use and a planter box project seemed like the perfect way to get rid of some of our stockpile.

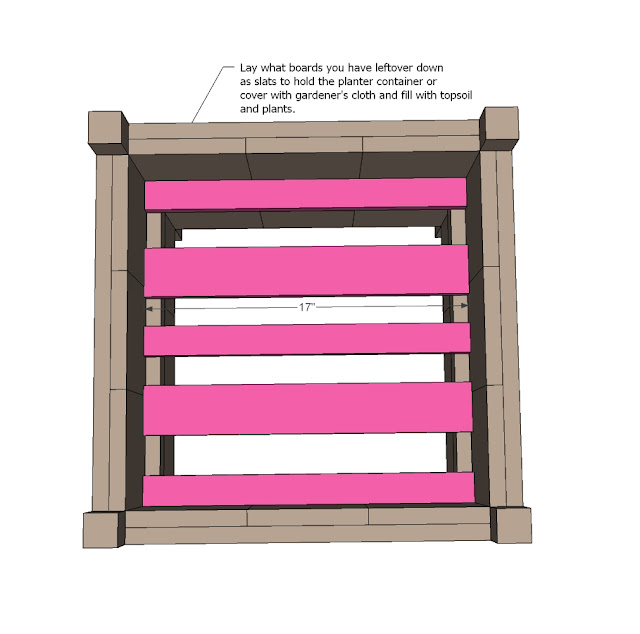
I had a good idea of what I wanted and I found the plans for the project on Ana White's site:
Planter Box Plans.
I didn't add up the cost of these boxes, because we had most of the wood and only needed a few pieces, but I'd say they were definitely less than $10 a box. 


DIY Ana White Planter Boxes | Whispering Whims


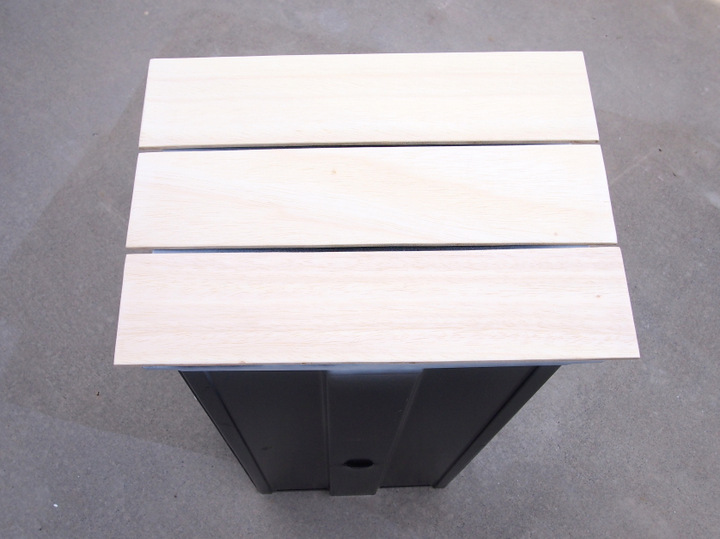
1. Cut all your wood to size and lay out your sides.  We altered our dimensions to fit our HD planters so they would slip in for a snug fit.  We laid out all the sides to take measurements and make sure everything would be square once assembled.
2. Glue, clamp, and nail the cross pieces to the pallet wood side planks.
3. Drill pocket holes.
4 & 5 Insert your pocket hole screws and attach the legs to your sides.

We made the legs flush with the top of our sides and made a simple frame for the top.  This allowed the lip of our HD planters to sit firmly on top.  *Not visible: there is a shelf inside these planter boxes to hold the bottom of our HD planters.

Once assembled, grab a lovely assistant, paint, and brushes and finish your project! :)
{Watson did get a bit of white paint on him, haha}  


Something I didn't do, but wish I did: fill in the cracks with wood filler.  There were a couple places that really could have used it, but I was in a rush and decided to skip it.  They turned out great, but could have been even better had I taken an extra 30 minutes.   On an off weekend, we are going to use wood filler in the seams, sand them down, and do a second coat of white paint. 

Thursday, July 2, 2015

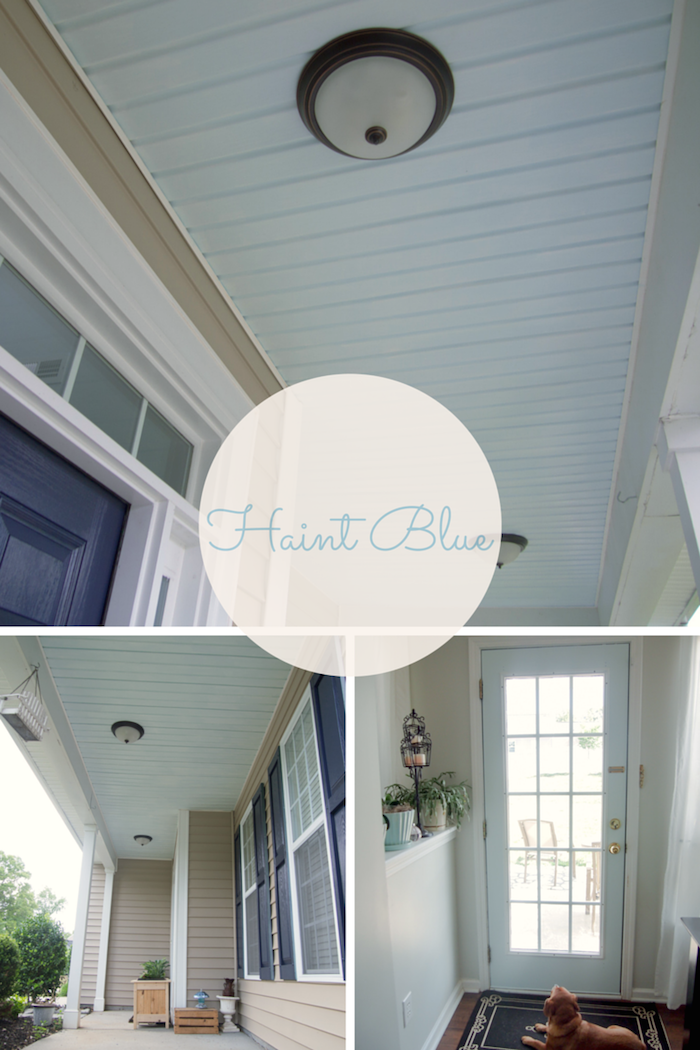
Haint Blue

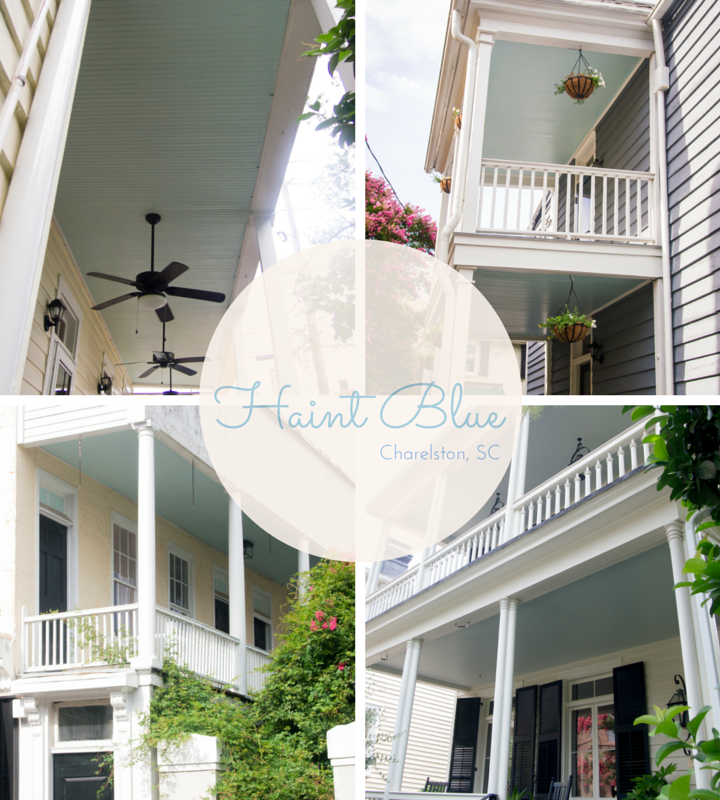
If you live in the South, you're probably already familiar with this timeless porch ceiling tradition.

If you are FROM the South, you might even know the reason behind the tradition.

If you are like me, you simply think the beautiful haint blues are a lovely addition to a porch no matter where you live.  I love when something feels personalized and has character.  

Here was some of my inspiration from a recent trip to Charleston, SC:


Living in a new build home feels stale sometimes. Since moving in, I have been on an endless quest to personalize, build character, and give life to this "standard" house of ours. 

While looking for the perfect blue color to paint our porch ceiling, I learned that these blue shades are referred to as "Haint" blue.  Apparently, the reason behind the blue porch ceilings is not just because it is pretty.  The belief that haints, or spirits, couldn't cross water led people to paint their porch ceilings blue, as a precaution from spirits entering your home.  

I also read something about it warding off mosquitos, which I can tell you is absolutely false. I came away from painting our ceiling with quite a few bites!  So that myth is busted. 

Every time we go to a home improvement store, I grab a handful of paint chips that I like, which means I have built up my own collection of assorted colors to draw inspiration from.  It just so happened that I had a chip in my collection that was a perfect haint blue.  
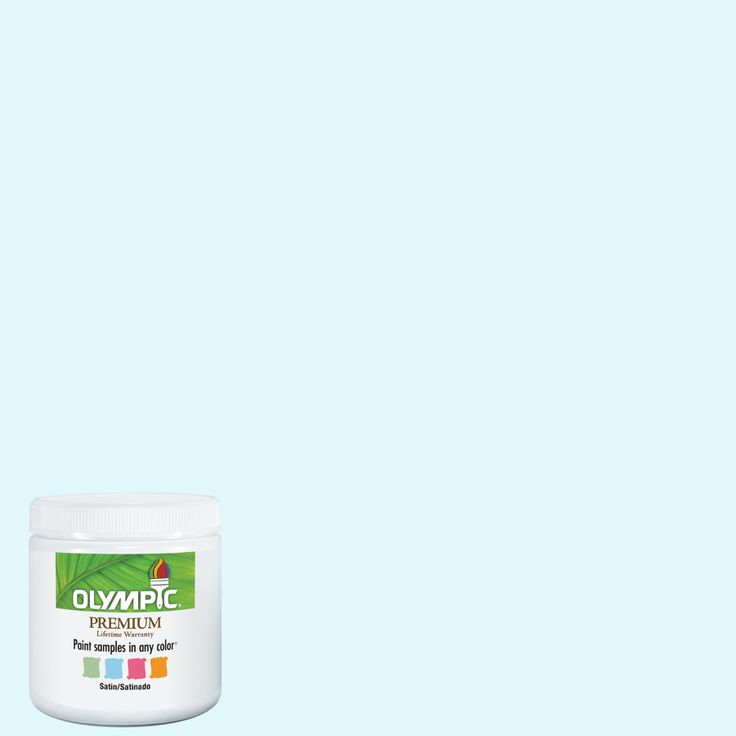
Blue Persuasion A56-2, by Olympic

It's a nice pastel and a little on the warm side of blue, which I like. I had enough left over that I decided to give our back door a makeover too! :)  


We also changed out the old light fixtures.  They were so gross and ugly.  The silly part though is that I spent all evening/night painting the ceiling, that by the time the lights were ready to be installed, it was dark out!  We looked like a couple of geniuses out there with a flash light trying to put them up. Moths kept hitting Paul in the face... haha.  Oh the smart things we do! 

I think the ceiling goes nicely with the new shutter color. :)

Sunday, June 28, 2015

Shutters & Front Door Makeover


YAY! This project has been on my list for such a long time.  Unfortunately, since it wasn't one of the priority items, it's been pretty far down on our list.

Of course, I choose to bump it up the list and make it a priority during a record breaking heat wave! haha  Who needs hot yoga?  Not me... just give me a paint brush and send me out into the hot and humid Carolina summer! ;)
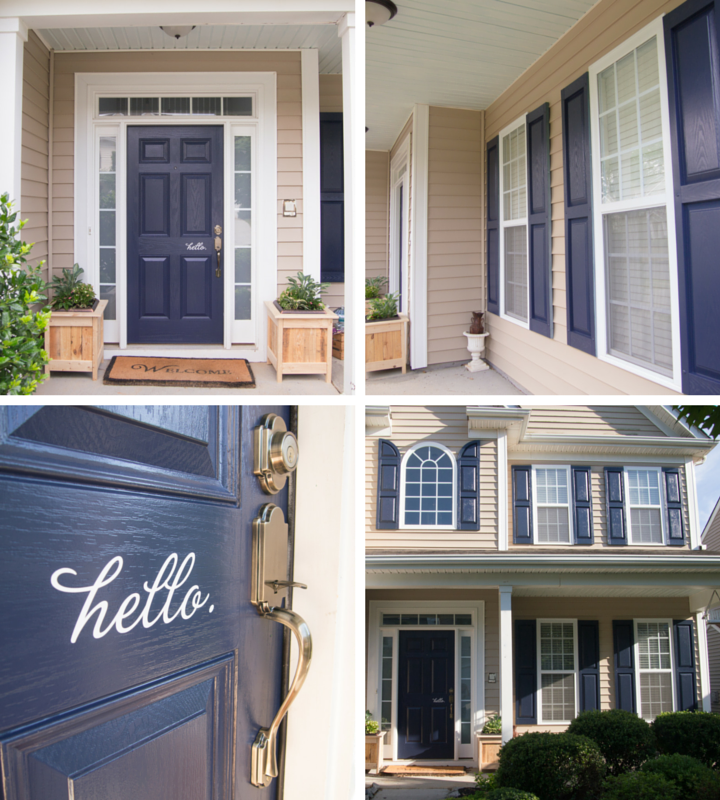
Here is how the color shows: Morning, Noon, and Night.


Anyway, it was way easier than I initially thought it would be.  Once I got over the sweating, the painting process was actually quite simple.  Our shutters and front door were in pretty good condition.  No paint was peeling and the old paint was worn pretty thin.  No sanding was needed, just a good rub down with a damp cloth to get of any dirt, pollen, or dust.


Overall, it took me about 2 hours in total to paint everything, including touch ups.

We chose Naval Blue (6244) by Sherwin Williams.  I was looking for a dark blue and was inspired by some other Pinterest front door makeovers.  What I really love the most about this color is the vibrancy of the blue during the brighter parts of the day.  It has this lovely ocean-like quality.  I remember back in my Crayola days, there was this blue "cerulean" crayon that looks like it would be really dark, but was surprisingly a bright saturated blue.  This SW Naval Blue is a bit like that.  It's not as surprisingly blue, which is a good thing, but it has such nice undertones that get picked up in the sunshine.

It came out very clean and classic looking, and I love how the exterior gloss really shows off the grain in the shutters and door.  It makes them a lot more interesting than the faded, worn, matte green that was on there before.

One special touch was a "hello" decal I ordered for the front door.  I LOVE how it turned out!

We are one step closer to a charming home with character! :)

Friday, March 13, 2015

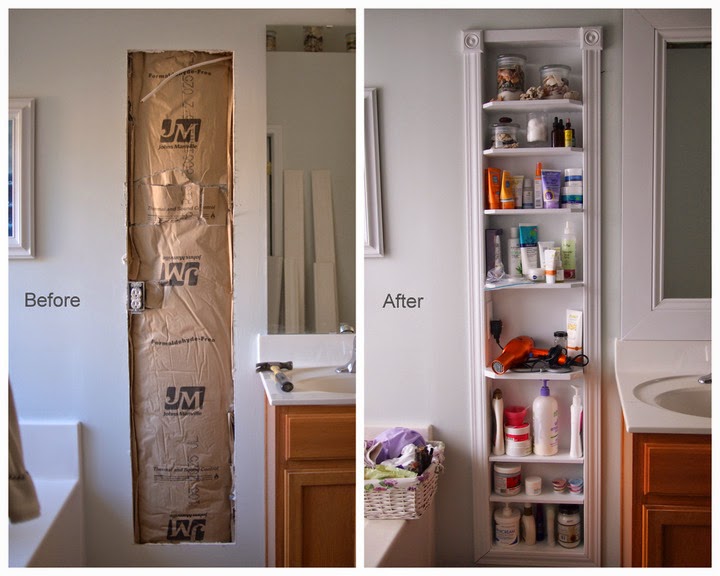
Bathroom Shelf: Just cut a hole in the wall!

I might be a bit of a product junkie.
I like lotions, and soaps, and masks...
but my bathroom doesn't have nearly enough storage! 

So, what's a girl to do?
Well cut a hole in the wall of course! haha
(or get the husband to cut a hole in the wall!)


Right before we left on our trip down under (November/December), 
I got the brilliant idea that a built in bathroom shelf is exactly what I needed.
And no, an IKEA shelf would not do.  No sir, I needed a hole in the wall!

A hole is exactly what I got! 
And it stayed a hole for about a month until we got back from our trip. 


But it was finished around Christmas time and
I'm so happy to not have a pile of unorganized products all over the counter.
(I know Paul is happy too!)

We even framed the bathroom mirror while we were at it! 
Next:  Paint the bathroom cabinets and install some new light fixtures. 


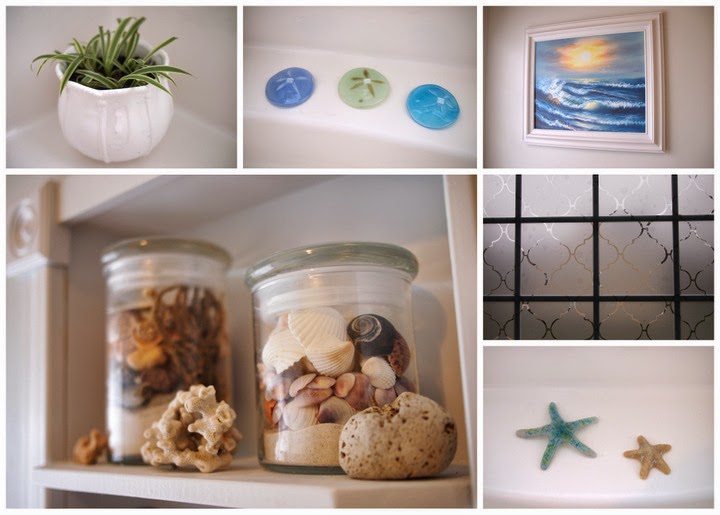
I can even fit some of my beach treasures and decor now!
The glass sand dollars and starfish we picked up on our trip to Oregon in 2013, the painting we got in RI last summer,
and the shells are a mix of treasures from NC, FL, RI, and Australia.  I'm a beach picker for certain.

We also put up some transparent privacy screen for the bathroom window.

DIY Pottery Barn "Addison" Style Headboard


Fireplaces are very romantic and a gorgeous mantel can really create a lot of interest in a room,
 which is why I've been in love with this mantel style headboard for a while.  

Every time I receive the Pottery Barn catalog in the mail, 
I comment to Paul that I really need to buy/make/have this Addison Headboard
Mainly, he ignores me... 
or says something to the effect of "once we finish other projects." haha

BUT, this December he finally said yes. :) 

We found this Ana White plan and DIY'd it for about $150.00.

It took us about 2 days to cut, assemble, and paint.  
Since it was chilly, it resided in our living room while I painted everything.

Pippa obviously was the project manager. --  Inspecting every detail.


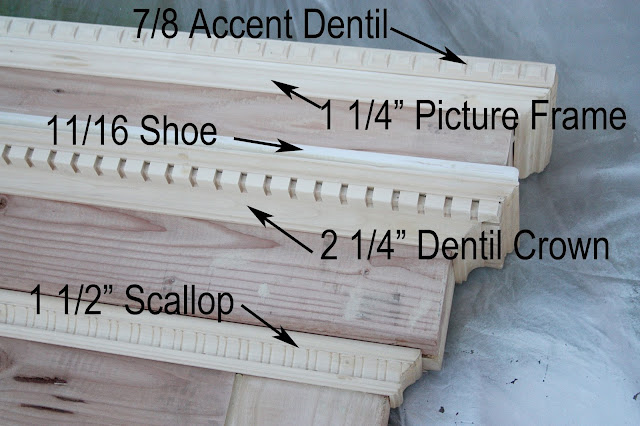
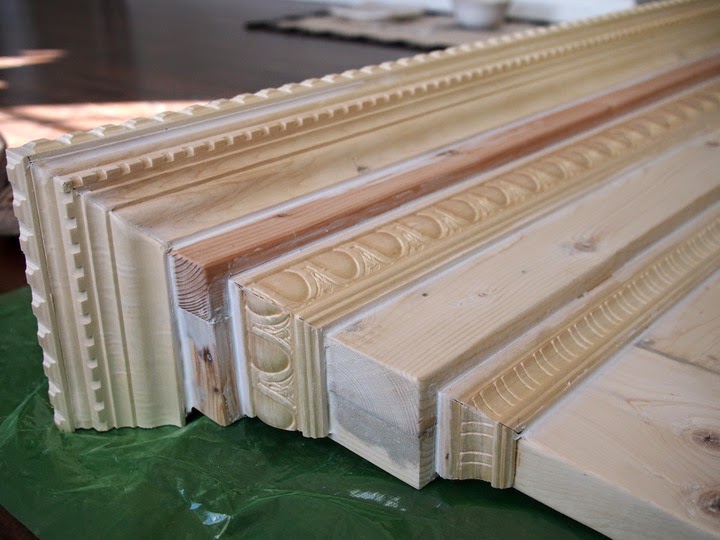
Moulding List:

  • 7/8 Accent Detail
  • 2 1/4" Dentil Crown
  • 2 1/2" Emboss Casing/Chair Rail 
  • 1 1/2" Scallop

* We got all of these from Home Depot (in case you are trying to find the same materials).


We wood filled, sanded, and caulked all the cracks, gaps, knots, and holes.


We omitted the 1 1/4" Picture Frame and 11/16 Shoe from our headboard design.
We moved our Dentil Crown piece up beneath the Accent Dentil.

In the original plans where the Dentil Crown is used, we placed the Emboss Casing/Chair Rail.

Image from Ana White

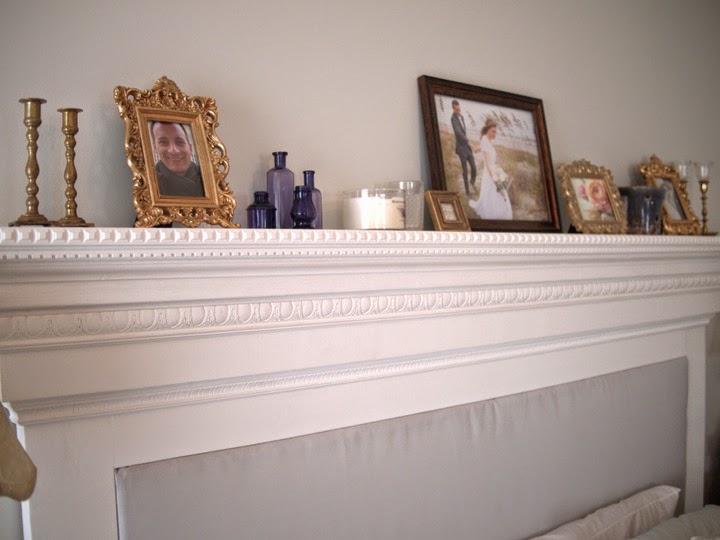
We're quite pleased with the finished product and we were so excited to set it up!
We ended up attaching it straight to the wall.
It would be quite a headache if it were to fall on us in the middle of the night.


 Over the summer I picked up a few antique amethyst glass bottles at a local antique store. 
This stuff is pretty neat.  
It wasn't made to be purple, but overtime turns purple from reaction to light.

They've been hanging around in storage, because I couldn't figure out what to do with them.
They finally have a spot! :)

Every time I see them I think of searching for beach glass in RI.  
Once in a while you'll find a real gem; purple glass! It's always a really exciting and special find.


Tuesday, December 23, 2014

Piano Makeover


I'm excited to present a project we finished in October,
but didn't have time to post before we left for our Australia/New Zealand trip.
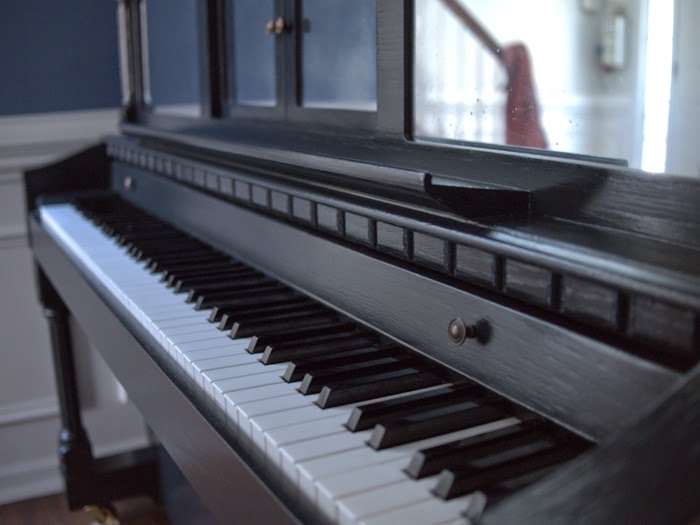
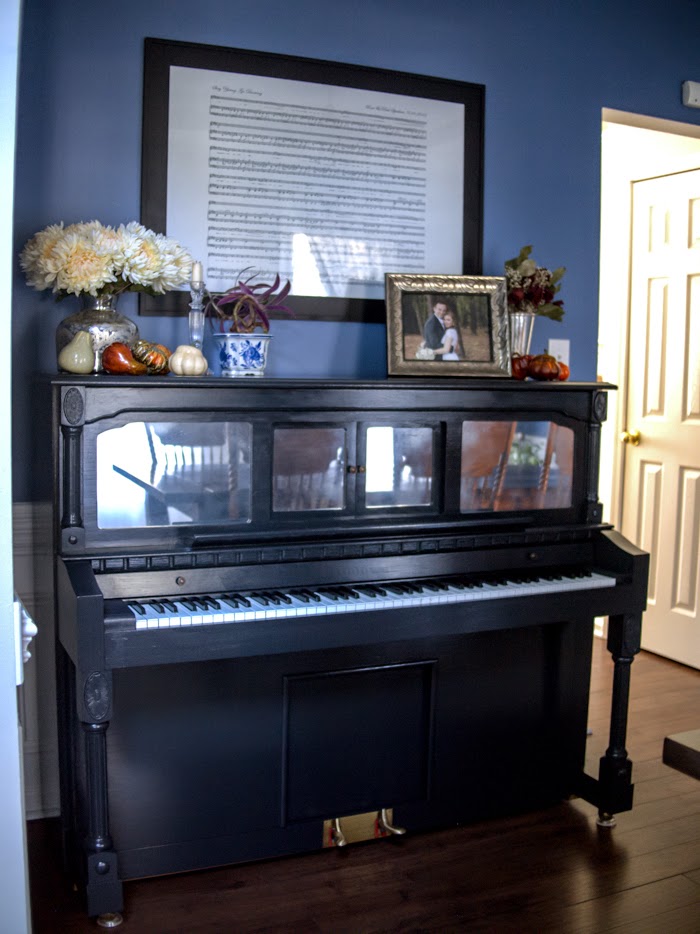
The makeover of our player piano! :)

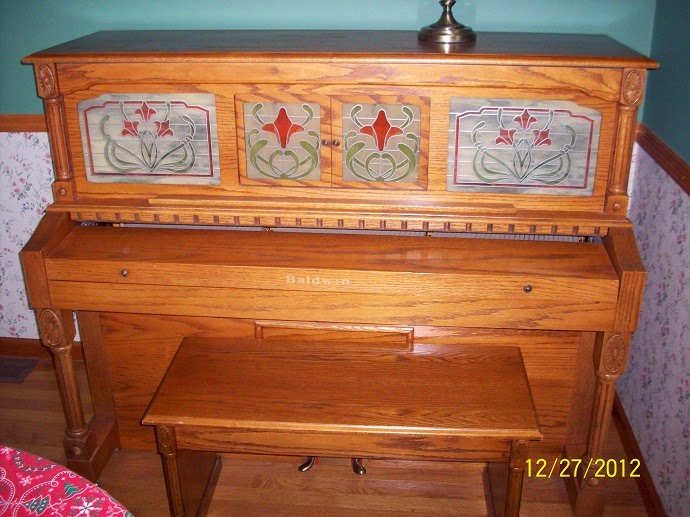
The honey oak was not working with the other wood tones in our house, 
especially since we finished redoing the floors last Christmas.
Here is a before picture. Back when it resided in Paul's childhood home. 


I know that a lot of people probably hate the idea of painting over nice wood,
and probably even more so painting a piano, 
but it works for us and we are SO pleased with the results!


We started by dissembling the pieces that come apart easily.
Next we made sure everything was dust/hair free [pet's shed so much!].

I researched painting a piano extensively and exhaustively!
Some people sanded and stripped their piano, then primed, painted, and finally sealed it.
This just seemed like more than I wanted to take on.

Others I saw taped off the keys and other areas that needed to stay paint free, 
and then primed the piano with a spray paint primer,
Then they painted and sealed the final coat.

Again, this seemed like a lot of work.  
I knew there had to be an easier way.

I had been reading a lot about chalk paint, 
Annie Sloan, DIY with plaster, etc...
and it seemed possible that I could paint our piano with 2 thin coats, 
WITHOUT priming! 
YES! This seemed like the way to go! :)


Closer look at our framed sheet music of our wedding song. :)
I went to a local antique store and picked up some
Then swung by Michael's and picked up some India Ink.
(I had read that if I mixed the ink into the chalk paint I could get the Graphite color a little darker).
It worked out well, though I do warn that it was messy!
I suggest a bigger container to mix in.

I decided it would be best to paint the piano bench first, 
since any mistakes or regrets would be minimized.
Luckily, we loved how it turned out, and went ahead painting 2 coats on the piano.

We finished by applying 2 coats of polycrylic, 
instead of the wax, since we wanted the top coat to be as resistant as possible.

The next part of this project was replacing the "stained glass" inserts, 
that no longer matched the piano and also did not match our decor.
We thought about getting some real stained glass made to replace them, 
but since we were eager to get this project wrapped up, 
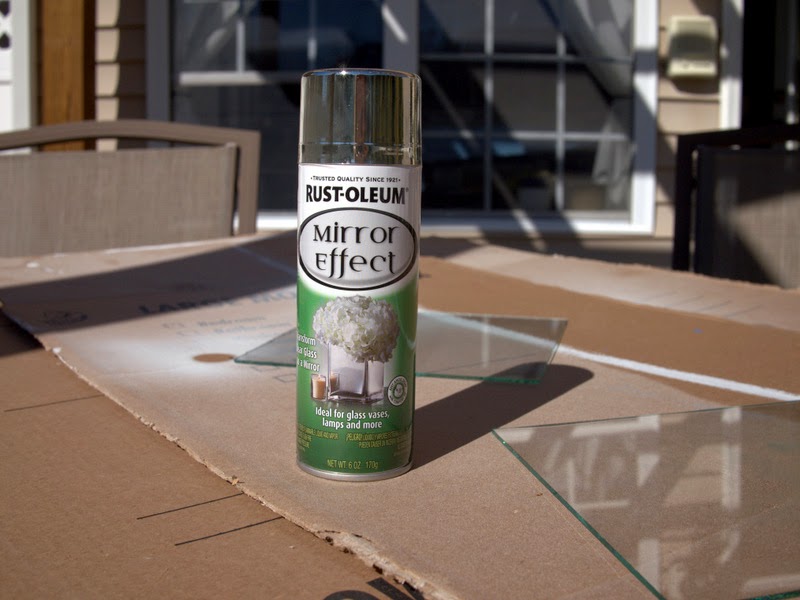
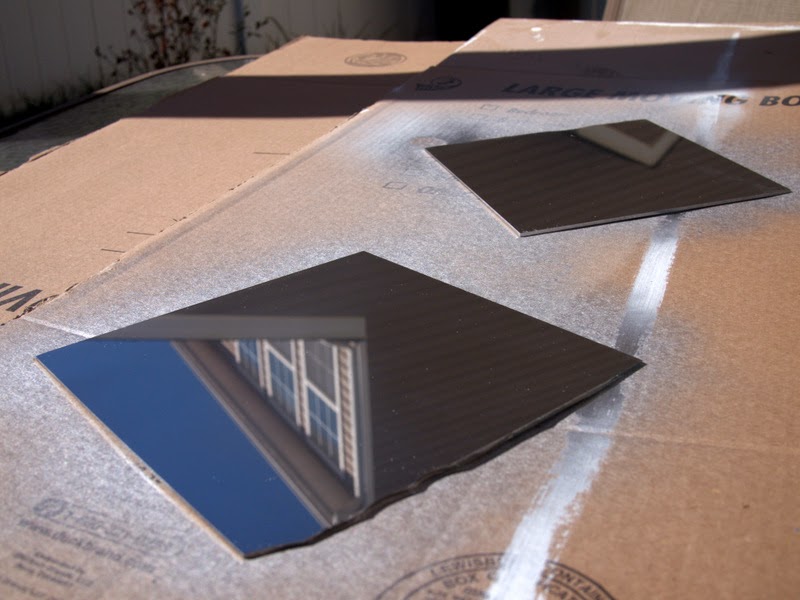
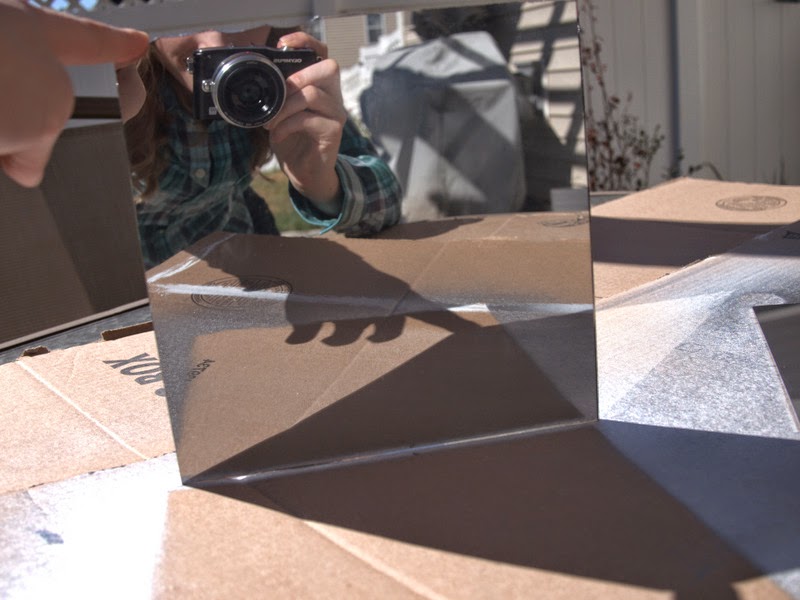
we opted to cut our own glass inserts and give them an antiqued mirror effect
with Rust-oleum's "Mirror Effect" spray paint and a Clear top coat. 

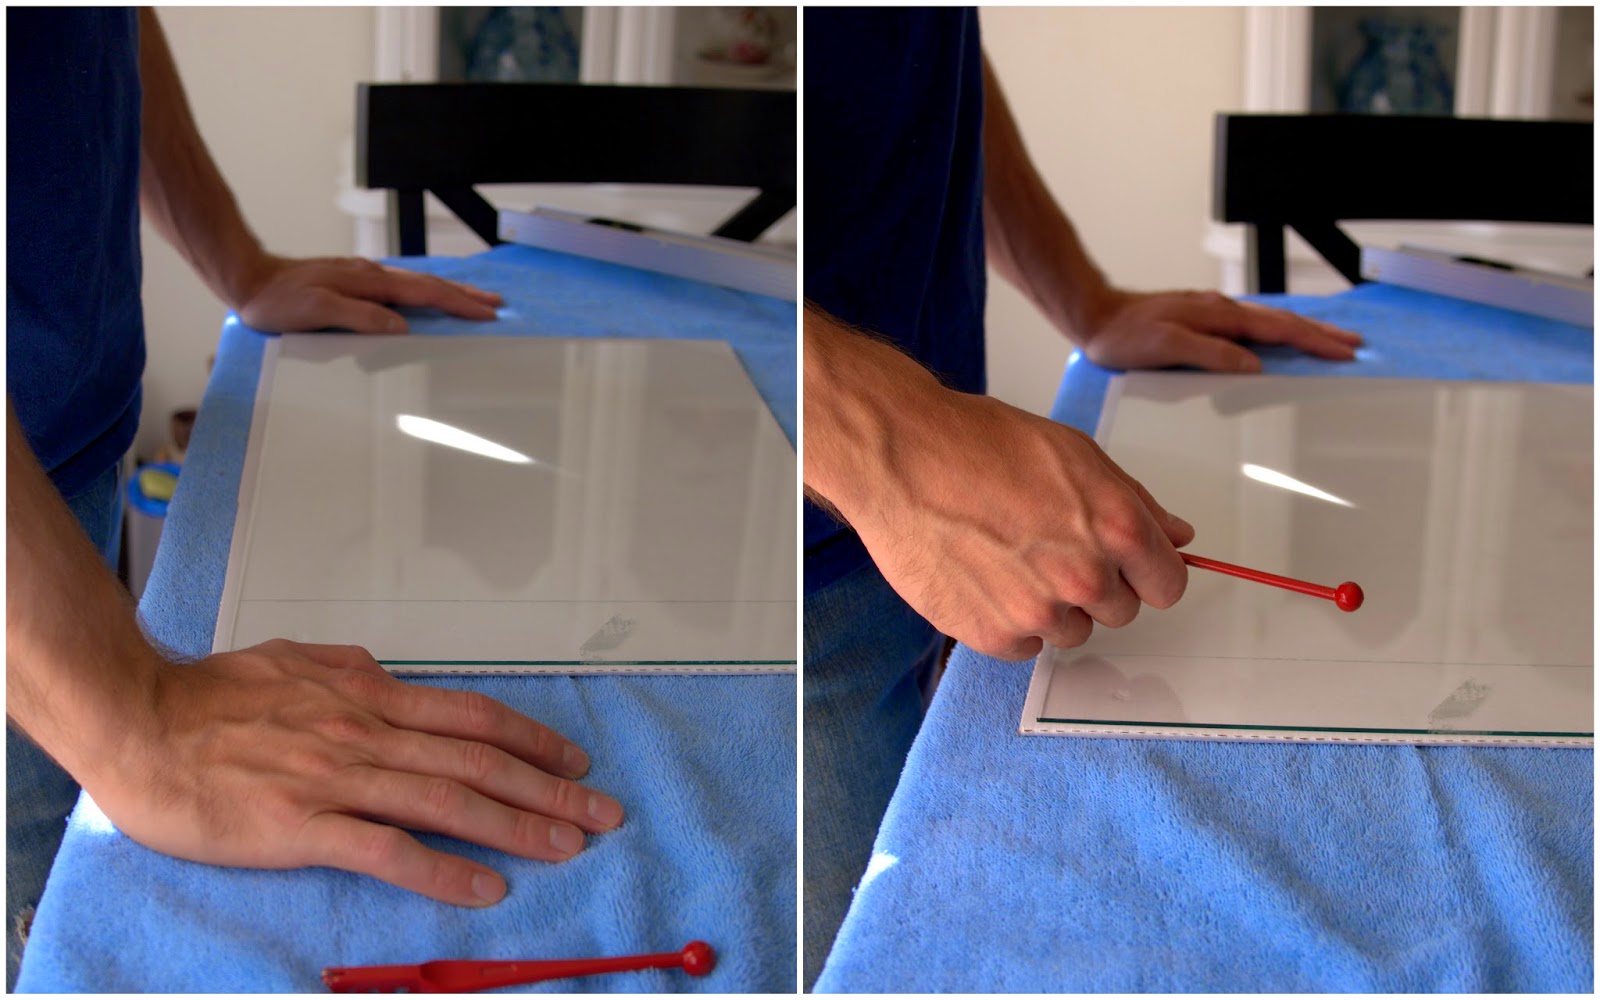
Cutting the glass was the most difficult part,
and I bet Paul could write a full post on everything he learned!
"Simply", score the glass, tap evenly down the line, and then break over a straight edge.
Easy as that...haha


It comes out very reflective and just like a mirror.
 We ended up wanting something that looked a bit more vintage, so we coated the back with a clear poly spray and it gave it a foggy aged look.


The whole thing was ready in time for Halloween! :)  
The mister played spooky music every time I greeted little trick-or-treaters at the door!
Surprisingly, it wasn't the little ones that were spooked.. it was the teens! haha


All images and text are property of Rose Spadaro and may not be reproduced without permission. This site is powered by Blogger and was made a little lovelier by The Sunday Studio.