Tuesday, December 23, 2014

Piano Makeover


I'm excited to present a project we finished in October,
but didn't have time to post before we left for our Australia/New Zealand trip.
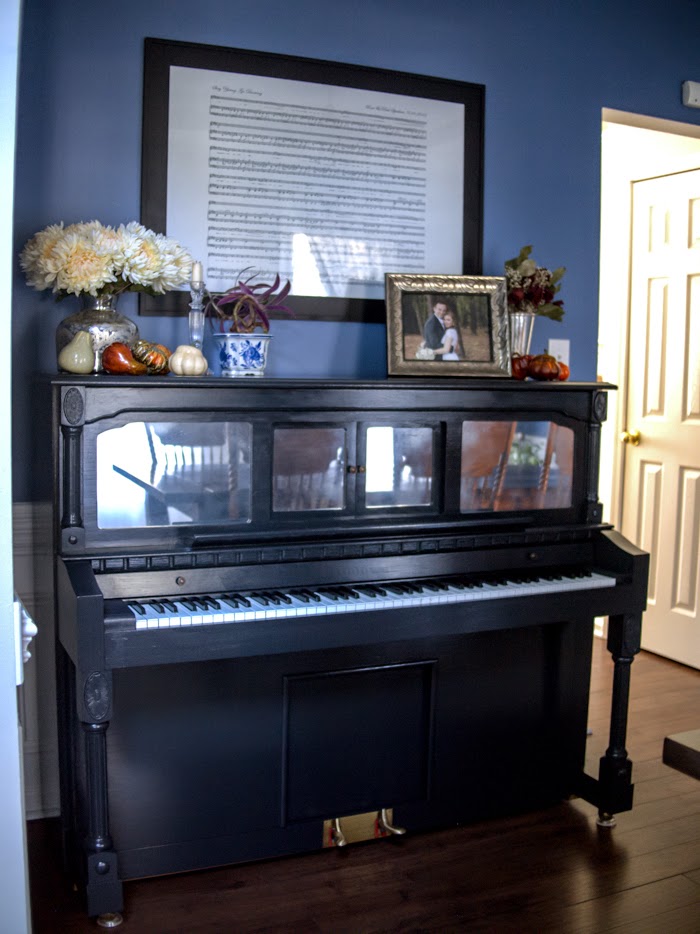
The makeover of our player piano! :)

The honey oak was not working with the other wood tones in our house, 
especially since we finished redoing the floors last Christmas.
Here is a before picture. Back when it resided in Paul's childhood home. 


I know that a lot of people probably hate the idea of painting over nice wood,
and probably even more so painting a piano, 
but it works for us and we are SO pleased with the results!


We started by dissembling the pieces that come apart easily.
Next we made sure everything was dust/hair free [pet's shed so much!].

I researched painting a piano extensively and exhaustively!
Some people sanded and stripped their piano, then primed, painted, and finally sealed it.
This just seemed like more than I wanted to take on.

Others I saw taped off the keys and other areas that needed to stay paint free, 
and then primed the piano with a spray paint primer,
Then they painted and sealed the final coat.

Again, this seemed like a lot of work.  
I knew there had to be an easier way.

I had been reading a lot about chalk paint, 
Annie Sloan, DIY with plaster, etc...
and it seemed possible that I could paint our piano with 2 thin coats, 
WITHOUT priming! 
YES! This seemed like the way to go! :)


Closer look at our framed sheet music of our wedding song. :)
I went to a local antique store and picked up some
Then swung by Michael's and picked up some India Ink.
(I had read that if I mixed the ink into the chalk paint I could get the Graphite color a little darker).
It worked out well, though I do warn that it was messy!
I suggest a bigger container to mix in.

I decided it would be best to paint the piano bench first, 
since any mistakes or regrets would be minimized.
Luckily, we loved how it turned out, and went ahead painting 2 coats on the piano.

We finished by applying 2 coats of polycrylic, 
instead of the wax, since we wanted the top coat to be as resistant as possible.

The next part of this project was replacing the "stained glass" inserts, 
that no longer matched the piano and also did not match our decor.
We thought about getting some real stained glass made to replace them, 
but since we were eager to get this project wrapped up, 
we opted to cut our own glass inserts and give them an antiqued mirror effect
with Rust-oleum's "Mirror Effect" spray paint and a Clear top coat. 

Cutting the glass was the most difficult part,
and I bet Paul could write a full post on everything he learned!
"Simply", score the glass, tap evenly down the line, and then break over a straight edge.
Easy as that...haha


It comes out very reflective and just like a mirror.
 We ended up wanting something that looked a bit more vintage, so we coated the back with a clear poly spray and it gave it a foggy aged look.


The whole thing was ready in time for Halloween! :)  
The mister played spooky music every time I greeted little trick-or-treaters at the door!
Surprisingly, it wasn't the little ones that were spooked.. it was the teens! haha


Monday, October 20, 2014

DIY Farmhouse Table | The Unveiling


Mark farmhouse table off our list of unfinished projects! :)
Construction post [here].


This beauty is ready for the holidays!
Let the "fine" dining begin! ;)


Next to go is this light fixture, which amazingly looks nice pictured below,
but in real life casts a terrible yellow color in the room due to the faux stained glass.

Also, need to decorate the empty wall.
The dining room is getting there!


Sunday, October 19, 2014

DIY Farmhouse Table

In September, I finally convinced the Mister to help me tackle 
some dining room DIYs that I've been dreaming about. 

Ever since I saw Ana White's Farmhouse Table design on Pinterest, 
I knew that we were definitely capable of building it, 
and also that it would save us [some travel] money 
instead of buying something similar at Pottery Barn.
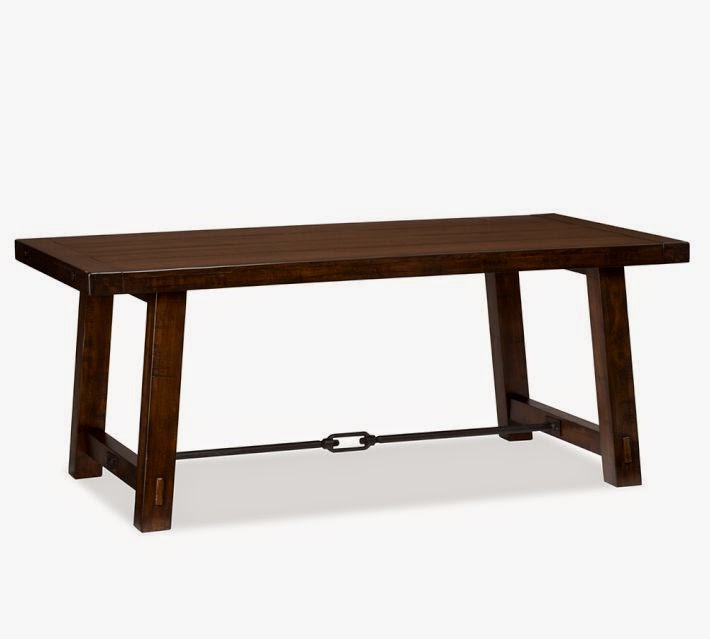
Pottery Barn - Benchwright Fixed Dining Table $1,499

Restoration Hardware - Reclaimed Wood & Zinc Rectangular Dining Table $1,395


We took some measurements of our dining room and were surprised to find
that the room is large enough to fit the table dimensions (85x38x30) described in the plan.
Which was surprising because our previous dining table was smaller,
but with the leaf in it didn't allow much space to pass around it comfortably. 
Partly because we keep our piano in here, but there really isn't a better place for it...
so, build a new table it is! haha


We used straps to hold together the breadboards and middle section of the table 
while we glued and screwed.

The base all put together and our lovely little helper. 

Checking the dimensions.  Not necessary, but I like a visual. :)
  
We used wood filler between the planks and in the deep knots.  

Since we were going for a more finished look and not so much reclaimed, 
we loved the how the filler looked after we stained and sealed the top.


We sanded heavily and made sure everything was as smooth as possible.

Wood conditioner before the stain.

We had some gel stain already, Dark Walnut, but it wasn't dark enough.
We ended up using Kona by Rust-oleum and it covered in one coat.

 We finished with 3 coats of Polycrylic.
I meant to use Satin, but ended up using Semi-Gloss.
Eventually, I will re-coat it with a Satin finish.

Click [here] to view the final table.


Based on Ana White's Instructions and Cut List, here was our purchase list:
(figures are rounded)

Heat Treated Wood:
$12 (4) 2x4@ 8 feet
$9 (2) 2x8 @ 12 feet
$6 (1) 2x8 @ 8 feet
$8 (1) 2x10 @ 8 feet
$55 | (1) 4x4 @ 10 feet **

**This was difficult to find.  We couldn't get it at Lowe's or Home Depot,
but found a small local wood yard.

Other Materials:
$9 | Rust-oleum Kona Wood Stain
$18 | Minwax Polycrylic
$10 | (2) Pocket Hole Plugs
$4 | 3" Foam Trim Roller
$8 | (2) 2.5" Pocket Hole Screws
$6 | 3" Wood Screws

Total Cost - $145


A note about our finish:

Step 1: Apply the wood conditioner with lint free rag.  Make sure to wear some gloves.
Wait 15 minutes or as instructions describe.

Step 2: Apply the stain evenly with lint free rag, with the grain. Again, wear some gloves.
With the Kona stain it only needs 1 coat to achieve the level of darkness.

Step 3:  We let it dry overnight and applied the polycrylic sealer, 3 coats. We applied it
using the 3" Foam Roller in long rows, with the grain, and then used 3 inch foam brushes
to follow over the row in one long smooth swipe to brush out the bubbles.
We found this method to be very effective in creating a smooth and even coat.

*The polycrylic dries very quickly, so we were able to coat the base and table top all in one go.
We alternated between the base and top until all coats were applied.

*Also, between all coats of stain and polycrylic, we made sure to gently dust, wipe, and sometimes vacuum, the surface to make sure nothing got trapped between the coats.


Carolina BalloonFest 2014


After 3 years of missing this Festival,
 that takes place every year in Statesville, NC
around the middle of October, 
we finally made it!

BUT it was not such an easy feat this year!
It took us 3 hours in traffic, and about a mile walk in just to get there.
At least it was a gorgeous Autumn day to be out.  
Not a single cloud to be found...

Then we received the unfortunate news that the balloons would not be flying due to "wind".
Since we were starving and needed to stretch our legs,
we decided to stick around anyway.

And fortunately, the balloons did inflate and start to glow around dusk. :)
We got lucky.


MAYBE next year we'll see them fly.
Although, in all honesty, I'm not sure the traffic, food, or variability of the weather is worth it.
I think with some more planning and experience 
we will do what we saw many other brilliant people doing...
Packing a cooler, some chairs, and finding a good vantage point 
(away from the festival)
to watch the balloons fly. 


All images and text are property of Rose Spadaro and may not be reproduced without permission. This site is powered by Blogger and was made a little lovelier by The Sunday Studio.